

QuickBooks provides everything your small businesses needs to send and receive payments electronically. Here’s an excerpt provided by Intuit to show how easy it is to process ACH electronic payments.
If you already use QuickBooks Payments, you know you can easily accept credit card payments. But those credit card fees can add up, especially for recurring sales.
Now you can process bank transfers (also known as ACH transactions or eChecks) for a lower fee of 50 cents per transaction.
And since you enter each customer’s bank info directly into QuickBooks, QuickBooks takes care of the accounting and saves you time. You can stop processing eChecks in the Merchant Service Center and copying the details over to QuickBooks.
How ACH bank transfers work
First, sign up for QuickBooks Payments. Then:
- Select the Check or ACH payment method as you create a one-time or recurring sales receipt or as you receive a payment.
- Enter your customer’s bank info.
- Get authorization from your customer. You can read them a script or have them fill out a form.
- Process the transfer and get paid!
The rest of this article goes through each step in more detail.
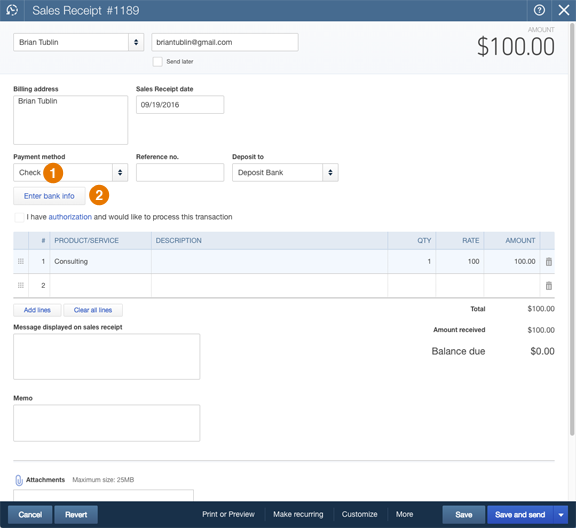
Step 1: Select the payment method
Starting from the Receive Payment, Sales Receipt, or Recurring Transactions page, select the ![]() Check payment method so that the
Check payment method so that the ![]() Enter bank info button appears.
Enter bank info button appears.
Or if you add a new payment method name such as ACH, Bank Transfer, eCheck, Bank, or Transfer and select it, an Enter bank info button appears in those cases, too.
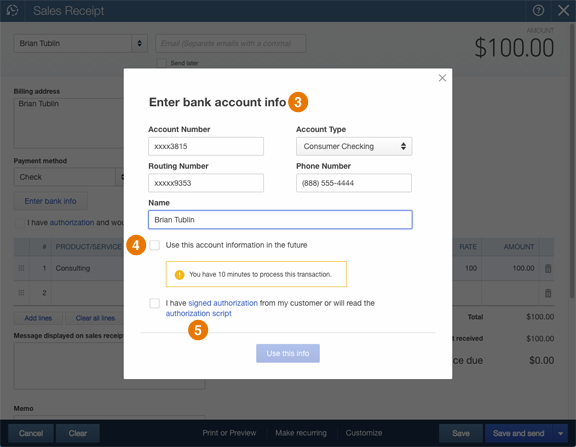
Step 2: Enter bank info
Click Enter bank info and fill out your customer’s ![]() bank account info, phone number, and name.
bank account info, phone number, and name.
If you clear the ![]() Use this account information in the future box, you’ll need to process the transaction within 10 minutes for your customer’s security.
Use this account information in the future box, you’ll need to process the transaction within 10 minutes for your customer’s security.
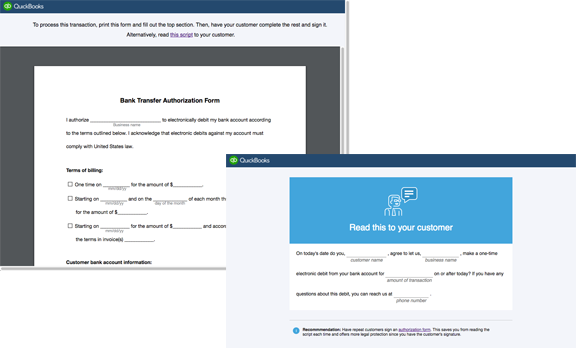
Step 3: Get authorization
Whether you save the account information for the future or not, you still need to ask for authorization from your customer.
Click one of the ![]() text links above to open the authorization form or script below.
text links above to open the authorization form or script below.
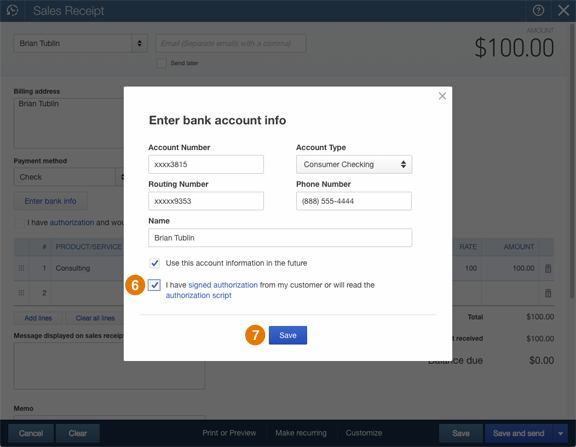
Step 4: Process the payment
Close the authorization form or script and select the ![]() I have signed authorization checkbox to show you’ve received authorization.
I have signed authorization checkbox to show you’ve received authorization.
Click ![]() Save.
Save.
Finally, back on the main form, select ![]() I have authorization and would like to process this transaction and click
I have authorization and would like to process this transaction and click ![]() Save and send.
Save and send.

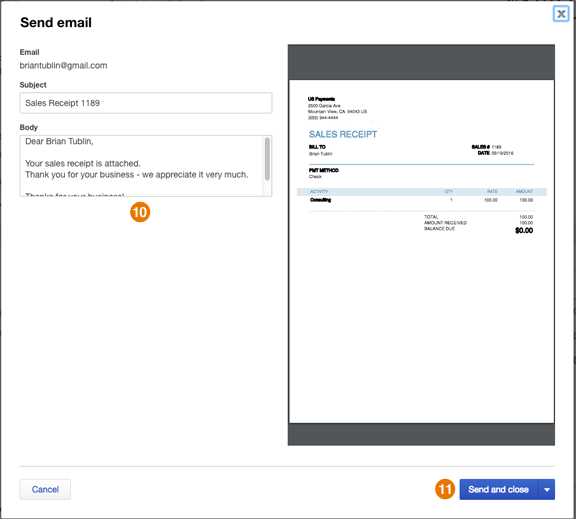
Make any changes to the ![]() email message to send to your customer and click
email message to send to your customer and click ![]() Save and close.
Save and close.
You’ll get a receipt confirming that the payment is on its way! Plus, QuickBooks automatically records the payment to keep your books up to date.
Need additional help?
Contact us for any assistance required to ensure QuickBooks is delivering as much value as possible for your small business!